Friday, February 19, 2016

Shaping Braces and Gluing Top

For this guitar, I based the bracing pattern off a 1931 Martin 00-40H. I used Adirondack Spruce for the x-brace, lower transverse, and finger braces. The upper transverse brace is a 3-ply laminate of Adirondack and Rosewood, the upper graft and sound hole braces are made of Sitka Spruce, and the bridge plate is Maple. I chose to approach the shaping of the braces in a traditional Martin style, bringing the profile to a triangular shape and scalloping the lower transverse and x-braces. This process was done entirely by hand using chisels and finger planes to carve the braces, flexing and checking the tops stiffness often. Once I started to reached my desired rigidity, I tested the tap tone by holding the top lightly while taping in various locations. I listened closely to the tone and sustain of the material while making small changes to the bracing until I was happy with the voice of this instrument, a process that I thoroughly enjoy. 
Next, I prepared the rib structure for glueing the top. I started by installing spruce side braces and sanded the kerfing and neck block flat in the upper bout. I sanded to a 50' radius in the lower bout matching the radius of the constructed top. I notched for the upper transverse and x-braces by tracing the outline of the braces to the kerfing and cut the material away with a chisel until the brace ends fit snugly in place. I applied glue and laced a bungee over the top for clamping pressure. Once dry, I flush trimmed the excess top wood using a router.
I started work on the Rosewood back while waiting for the glue to dry. I used Sitka spruce for a center strip, and sanded a radius into it once it was dry to give it a clean appearance. I used Adirondack spruce for the back braces, and glued them in place using the go bar deck in a 25' radius dish.
 - Justin Ness

Friday, February 5, 2016

Installing Kerfing, Rosette and Bracing

For this sinker Redwood top I decided to go with a classic Herringbone rosette. I laid out the pattern in pencil and sealed it with a thin coat of lacquer to help prevent end-grain splitting while routing. I used the router with a sound hole cutting jig to carve a circle partially into the top. I took my time measuring my cuts, practicing on a piece of scrap wood. When I made my final passes, it worked out just as I had planned and the Herringbone was a perfect fit.
I decided to add an outer ring by inlaying purfling strips to accent the rosette, I dampened the strips and bent these by hand using a bending iron. I placed a thin bead of glue in the bottom of the channel before inlaying the rosette and ring, clamped it and let it dry. Using scrappers, I removed the excess height bringing it flush to the Redwood. I finished by sanding it out before using the router one last time to cut out my sound hole.
Next, I laid out my measurements in pencil and started work on the bracing. I took a piece of Adirondack spruce, tilted the bandsaw table to match the end grain vertically and preceded to re-saw the spruce to get the best quarter-sawn stock possible. I decided to go with a 3-ply laminate of spruce/rosewood for the upper transverse brace to provide extra strength. After cutting my braces slightly over-sized and thickness sanded them to width. I used an edge sander jig to shape a 50’ radius into the bottom of the lower braces, notched and fit the x braces together and started the gluing process using a go-bar clamping deck.
I placed a 50’ radius dish in the bottom of the deck and used strips of maple to apply clamping pressure and hold the brace firmly in place while letting the glue set. The first round of gluing installed the x brace, lower transverse and finger braces. For the second round, I flipped the dish over to give myself a flat surface and glued the upper graft and transverse brace in place. For the final round of gluing I once again used the 50’ radius dish and installed the bride plate and sound hole braces. 
While waiting for the glue to dry I took some time to install the mahogany kerfing. I have done this using clothespins with rubberbands on previous builds, but this time around I used small spring clamps. The clamping pressure was much better, and the smaller footprint allowed me to place more clamps tightly around the entire rib structure. 
Next step, shaping the braces and voicing the top. Stay tuned!
- Justin Ness

Friday, January 29, 2016

Bending Rosewood Sides for Style-00

This week marked the beginning of a new build, the Redwood/Rosewood Dove-00. I started by joining the old growth sinker redwood top. This particular piece of wood is very strong with the grain but a little softer cross grain, I sent it through the thickness sander and took it down to 3mm.
Next, I prepped the Madagascar Rosewood sides for bending. I traced a side template that I designed in Rhino3D and made on the CNC, this gave me my exact size and taper for each side rib. Using this template, I flush trimmed the sides to dimension on the router table. I sent both sides through the thickness sander until they reached a thickness of 2.3mm. I bent the sides using a heating blanket, sheet steel and a bending mold that I designed and build with Rhino3D and CNC. I dampened the rosewood with water and wrapped it in paper towel and foil. I placed a heating blanket on the rib and sandwiched it between two spring steel sheets, placed it on the side bending mold and started the heating process. While applying heat for three minutes, I slowly pressed the center waist clamp down. Next, I bent the lower bout by slowly pulling the spring clamp, repeating the same process for the upper bout. 
I let the side cool down for 30 minutes before I gave it another 3 minutes heating session. I kept it in the mold until it cooled down to room temperature and removed the wood from the bending mold, peeled off the foil and transferred it to the outside mold. I clamped the cauls in place to prevent the wood from springing back helping it retain its new shape. I constructed the neck and tail blocks, trimmed the ends of the ribs flush and glued them in place joining the two sides together giving me the first glimpse of what this guitar will look like soon. 

- Justin Ness 

Friday, January 22, 2016

Blueprinting Acoustic Guitar in CAD

As a second year student at Southeast Tech - Guitar Development & Production, I studied 2D blueprinting and 3D modeling using Rhinoceros 3D CAD software. I was also trained in Mastercam CAD/CAM software as well as CNC operations. Starting January of 2016 I will begin construction on a pair of style 00 acoustic guitars. I designed and blueprinted this build using Rhino3D, modeling my bracing pattern off a 1933 Martin 00-40H. One guitar will have a tradition dovetail neck joint while the other will be equipped with a modern bolt neck.

Justin Ness Lutherie

The first guitar will have a sinker Redwood top and Adirondack Spruce bracing with a Maple bridge plate. It will have a traditional herringbone rosette and purfling with black binding, Madagascar Rosewood back and sides, African Mahogany neck and Ebony fingerboard and bridge. The second guitar will have a Redwood top, Sitka Spruce bracing with Rosewood bridge plate. It will have an Abalone rosette and purfling, curly Koa binding, Oregon Myrtlewood back and sides, African Mahogany neck and African Blackwood fingerboard and bridge. Both instruments will feature a traditional slotted headstock featuring Waverly guitar tuners.


 Check back next week as I begin to blog the construction of these guitars! 

- Justin Ness 

Friday, December 18, 2015

Archtop Construction - Part 1


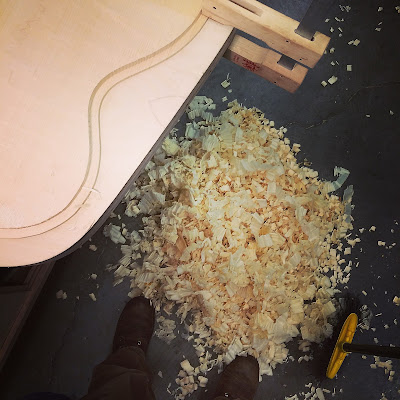
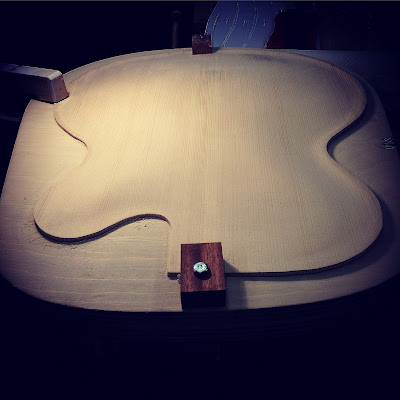
 I started my archtop build by joining two wedge shaped pieces of European spruce together, traced the guitar outline onto the wood and cut out the rough shape. I used a router to cut into the edge of the top to establish the desired thickness, this gives me a reference while carving the rest of the material away. After many hours of careful carving, measuring and scraping the archtop begins to take shape.

Justin Ness Lutherie

Justin Ness Lutherie

Justin Ness Lutherie

Justin Ness Lutherie

I used a bending mold with a heating blanket to bend my first maple rib. This guitar is going to have a cutaway on the treble side, so a different mold was needed for the second rib. This was my first time bending for a cutaway and I was a little nervous about cracking the maple. I used heat for an extended period of time while bending through the tightest curves, in the end the process was a success. I glued the neck and tail blocks in place joining the two sides together, glued the kerfing in place and the rib structure was complete. 

Justin Ness Lutherie
Justin Ness Lutherie
Justin Ness Lutherie

Justin Ness Lutherie
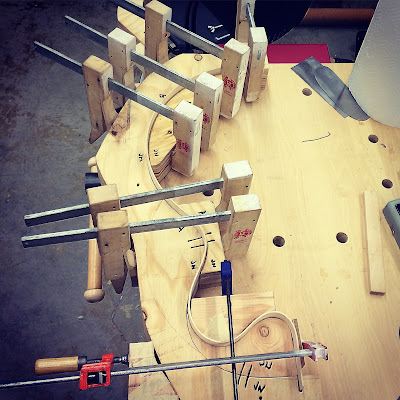
After carving the outside of the top, I flipped it over and started the process of carving the graduation into the inside. I drilled a series of holes to a depth slightly over my desired finished thickness. I used my gouge to carve away the bulk of material, switching to my planes when I started to approach the bottom of the drill marks. Next, I laid out my f-holes and carved them using a coping saw, knifes and files. 

Justin Ness Lutherie

Justin Ness Lutherie

Justin Ness Lutherie

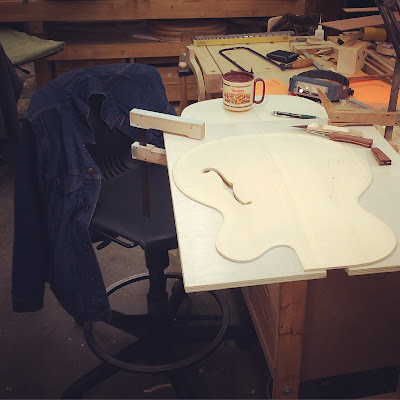
Once finishing the f-holes, I finalized the graduating to the inside of the top. I laid out three areas of varying thickness and drilled more holes to these depths. I continued to carve until I reached the bottom of the holes and took my time to scrape and sand the inside to a consistent smooth surface. I cut two tone bar braces from Adirondack spruce stock and carved them to fit snugly to the inside arching. I used feeler gauges and chalk fitting technique to get a perfect fit before gluing the braces into place. Once both braces were attached it was time to glue the top to the sides. I did this process by lacing a long bungee rope over the body for clamping pressure.
Justin Ness Lutherie

Justin Ness Lutherie

Justin Ness Lutherie

With the top glued to the sides the next step was to plan and calculate the routing channel for the binding and purfling. I am using an ivoroid binding with wooden black/white purfling, this requires two separate routing channels. I first cut for my purfling using a routing tower, immediately followed by the binding channel. Before gluing the binding into place I routed my pocket for the dovetail neck joint using a routing jig. 

Justin Ness Lutherie

Justin Ness Lutherie

Justin Ness Lutherie

I glued the purfling in place first using wood glue, I used masking tape to keep clamping pressure on it while drying. Next, I used a hot plate to heat the ivoroid binding causing it to become malleable. I bent it to fit the shape of the tight curves through the cutaway portion of the guitar. Once bent to shape I glued it in place using acetone and cyanoacrylate glue. I repeated the process of using masking tape to keep it in place while the glue set. I am very happy with the way the binding job is looking so far, the next step will be to scrape the binding and purfling flush and clean up the glue residue. 

Justin Ness Lutherie

Justin Ness Lutherie

Justin Ness Lutherie


  Im looking forward to getting back to this build after the holiday break! 

- Justin Ness