Monday, December 16, 2013

Sabbatical Entry 4

Well let's see, where do I begin on this one? 

Since entry #3 I hopped a flight to Texas for a 10 day trip starting in the capital of Austin.  I had the opportunity to spend three days at the Colling's Guitar Company and would like to thank everyone there for the opportunity.  If you are familiar with their instruments you know it can be argued these are the finest production instruments being made today.  Currently there are four graduates working there and it was great to see them again and have the opportunity to learn from them!

The first day there I had a chance to visit with Steve who oversees all aspects of the Colling's company and Ruth who is head of HR.  It gave them the opportunity to ask about our program and learn more about what we do here in Red Wing.  From there Steve was gracious enough to give me a tour of the factory, different shop areas and an overview of how things are done.  After peppering him with questions along the way (and running into our alumni) I was free to roam the grounds and take a few pictures.  Everyone there was incredibly gracious with their time and telling me anything I wanted to know.  Over the years the vast majority of people I've met in the industry are more than happy to share how they do things and believe there are no "secrets" to their work.  Often folks with this mentality are the most successful people in lutherie.

On the second day I once again was free to roam around, take pictures and ask questions.  Let there be no doubt I took advantage of that opportunity.  I'm not sure how many questions I asked but at the end of the day there were about 650 new pictures on my camera.  Before leaving I made it a point to head back to the finishing area to talk with Joe who completed both diplomas in our guitar program.  We chatted about a few things related to finishing and planned to spend final day  going over the processes he does every day.

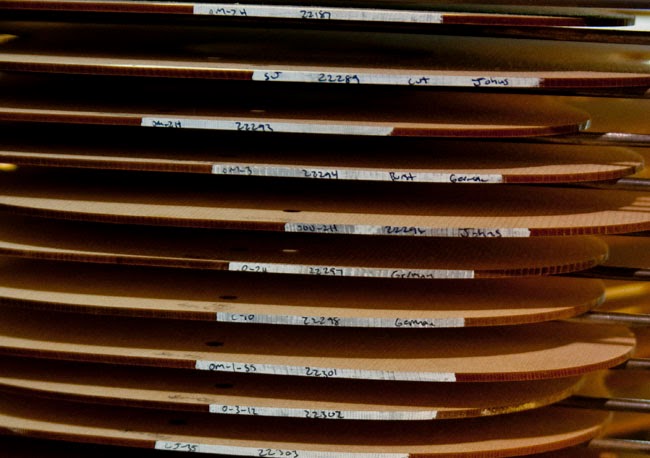
A quick little snapshot of acoustic tops with a few production notes included.

Here is an all Koa acoustic that was just removed from the outside mold.  The instrument will stay in an mold from the time the ribs are bent until the top and back are glued on.

There are no shortcuts when prepping an instrument for finish.  Many hours are spent even in a production setting making sure the surface is perfect.  I really like the vacuum fixture holding the mandolin so he can rotate it as necessary.

On my final day there I met up in the finishing department around 9am where Joe was already a few hours into his work day.  He had set aside some instruments to show me some of the finishing steps he does on acoustic guitars.  It was great to see the information he learned in the program being put to use and better yet, having the skills to develop his own approach to what he has learned working at Colling's over the last two years.  One of the most important things to me was seeing the pore filling process he refined so instruments can get through that step in a matter of minutes instead of hours.  To say I was impressed is an understatement.  I took some notes notes and plenty of pictures while he worked and am already prepping some test panels to give it whirl myself.  Just one of the great things in this work is you never stop learning and striving for a better way to get something accomplished.  Well, at least for the folks that know W.O.R.K. is not a radio station.

Here Joe is cleaning up the binding after the excess filler has been removed.  No detail can be missed in this job.

It takes a little practice to get this good at cleaning up purfling.

Amp Building

While in Texas I also spent four days building a guitar amp.  The 4 day workshop wasn't exactly what I expected (based on my interactions with the person offering the course) but the fact remained I finally had the opportunity to build a tube amp.  The gentleman slated to help me was extremely knowledgeable and a great all around guy.  Finally I was able to get my hands on a different set of electronic components and work through each stage of the build.  The amplifier design I chose was about the most intense one they offer for a first time build. There were times I wondered if I'd complete it in time for testing and troubleshooting, but after twenty years of wiring electric guitars those skills kept things moving along quite well.  

Day 1 

The first thing I wanted to do is go through what is in the kit and get it organized.  A little overwhelming at the start but I had help!  I quickly got the tube sockets mounted so I could wire up the filament circuit which provides power to all the tubes.
Apparently a lot of people spend the first day wiring up the filament circuit.  Here I've got it wired by lunch and was feeling pretty good.  I was cautiously optimistic at this point but I could tell the hard work hadn't actually begun.
After lunch I got the transformers, filter capacitors and circuit board mounted.  The filter capacitors hold a dangerous amount of DC voltage but at this point there was no charge in them. 
The project started to look like something when I mounted this circuit board.  It holds the different components for each of the tube circuits.  Little did I know there was a rogue wire!  I wouldn't know I goofed up until the last day....more on this to come.
Here is just one of the spots for grounding components.  It's important to separate the grounds appropriately so one circuit doesn't interfere with another one causing excess noise.
By the end of Day 1 I was feeling good about the progress but still slightly nervous about the time frame because I "didn't know what I didn't know".  Since this was my first amp build I had a sense of how much wiring I'd need to do but couldn't predict how long it would take.

Day 2

The morning began with another round of organizing things for the day and easing into the reality of what's ahead.  There's a brass strip inside the chassis with grounding points for each circuit.  Reality was just beginning to sink in as I reviewed the schematics and pictures included with the amp kit.

It took me a little bit to sort through the resistor values.  We use variable resistors in electric guitars known as potentiometers.  Those are easy because the values are stamped using handy things called "numbers".  Regular resistors have colored bands on them indicating their value and tolerance.  One sneeze at this moment and I would have started over.
Here's a potentiometer with a resistor and capacitor.  I wanted to get as many components wired before mounting the control pots because it's much easier to do outside of the amp chassis.
Since potentiometers have different values it was important to make sure each one going in the amp was sorted out before wiring anything more.  (It isn't just my OCD flaring up I promise)
Now the controls are in the chassis and it's time to get them wired into each circuit.
I started where the guitar enters the amp and worked my way from one end to the other focusing on wiring in the control pots.  Since I really didn't know how far I'd get in one day I'd save the bulk of the tube sockets for later.
Here's more of the first gain stage where we plug into the amp.  I took my time and tried to make sure I knew each connection was correct because I had no idea how much of Day 4 would be available for troubleshooting any problems.
Just working my way across the controls from the input side of the amp towards the output section.
Here is how my brain felt at the end of Day 2.  I'd been wiring all day and then thought about the rest of the tube sockets, all those wires and really began to wonder if I'd get this all done!  Why couldn't I just have built a single-ended Champ design to keep things simple?  Because my mentality has always been to jump in the deep end of the pool to see if I can swim.  Oh, and I wanted an amp with plenty of different "tones".

Day 3

So after an evening studying the schematic some more I felt I had a pretty good game plan for Day 3.  My goal was to have everything wired by the end of the day so Day 4 could be dedicated to troubleshooting the amp, trying different tubes and learning about different techniques for working on an amplifier.  This pictures shows.........more wiring.
Now I'm basically working my way from the input side of the amp to the output side of the amp but working each tube socket and components on the back of the amp trying to make sure I don't miss anything or make any mistakes.
Here is the completed amp.  Little did I know there was that "rogue wire" between two of the boards inside the amp.  This was a mistake I made on the very first morning but fortunately during final inspection we discovered it and got it resolved.

Day 4

There were only a couple of things I wanted to fix the morning of Day 4.  A couple resistors had been on my mind and how I had soldered them to wire extending the length to where they needed to go.  I couldn't get it out of my head and knew it needed to be a physical connection twisted together before soldering it.  I jumped right to it so we could begin troubleshooting any problems. 

Needless to say I was beyond anxious to hear how the amp sounded and was relieved when the power was turned on and nothing exploded.  In fact the amp powered on just fine and after some bias adjustments I was able to hear it for the first time.  It was a deja vu feeling similar to the first time I heard the guitar I made in 1994 as a student in our program!!!  

The amp sounded fantastic and then it was time for some "tube tasting".  I brought several different brands of 6V6 output tubes and a few different options for preamp tubes.  It was a great opportunity to hear the subtle differences from one set of tubes to another.  These days companies buy in bulk from overseas manufacturers.  They test all of the tubes and match them up according to a set of measurements.  While everyone raves about "new old stock" (N.O.S.) tubes that were made in America the reality is supply is dwindling and what's left tend to be tubes other people haven't wanted.  It was important to me that I use what is currently being made to hear the differences and have a sense for how to voice an amp later on.

After playing the amp with many different tube combinations I decided which ones to use and had the bias reset to that specific pair of 6V6's.  The amp was shipped back to Minnesota where it awaits a cabinet and speakers.  Oh, I also have to design and build a cabinet then learn the joys of covering it with material.  It's kind of like having a high performance motor sitting in the garage and needing the car to go along with it.  Just another item on my "to do" list.  Once it's done I'll put some pictures up on the blog and who knows, maybe a sound sample?

I know I took quite a few pictures during on Day 4 but for some reason those have also gone rogue.  I'll be sure to look for them and include it another blog post

Tuesday, October 29, 2013

Sabbatical Entry 3

Well considering it's been over a month since I've had a chance to do a blog post it's safe to say I've been keeping busy.  The weekly schedule I set for myself has worked well but the further into the sabbatical more overlap develops between the things I'm working on.  I find one week an area needs more attention and the following week the pendulum shifts back the other way. 

The fall semester mid-term has come and gone already and I was able to come in and do a couple lectures in our Guitar Overview course using all new handouts and PowerPoint presentations.  All the hours spent on those appears to have paid off with only a few minor glitches popping up.  It will be interesting to see how the new content helps students prepare for the spring electric construction builds.

CAD and CNC Work

The computer drafting course has been moving along briskly as we pretty much wrapped up the Level 1 training manual a few weeks ago.  At first it seemed I was in for a big leap when I started blueprinting a dreadnought acoustic guitar.  However once I got working on it things started to fall into place.  Throughout the process I realized the training manual and instruction had served me well but like anything, once you go from arranged exercises to starting from scratch, there are things you simply have to figure out for yourself.

We took the dreadnought outline we created in an early exercise and then began to create our own blueprint using another as a guide.  I went with the same bracing pattern on the example drawing but decided to use a little different scale length and  neck specs from a Gibson J-60 I've had for many years.

Here the blueprint is starting to take shape.  I started with the body outline, located and drew a soundhole then moved onto the bracing.  It's amazing how much control you have over everything created in Rhino.


I kept working on the drawing until I couldn't avoid creating a side template any longer.  I put it off because it gets us into 3D modeling and doing some different functions that weren't as comfortable to me as the 2D drawing.  We need to "extrude" the outline to create sides but also create a radius dish and use that to trim the top and back edges of the sides.  An acoustic guitar doesn't have a truly flat back and even if the top is built without any radius, over time it will change under the tension of the strings.

In the "perspective" viewport it becomes clear that this is a three dimensional object.  Using a radius dish we can trim the sides to a specific dimension and then roll the surfaces out to have a very accurate side outline.
Another shot of the radius dish in place so it's almost ready to be "trimmed".
The radius dish has been selected as the cutting object and next I'll click on the parts of the sides I want "gone".
Here I've clicked on one half of the body to trim it.  I'll repeat the process on the other side so I end up with the "back" of the body trimmed to shape.  There are some extra lines and outline in the picture I didn't notice when I captured this image.
I like this screen capture because you can see the blueprint I'm working on in the background.  I've already done the top edge so it's time to roll out one of the sides so I can get back to my blueprint in two dimensions.
You can see what would be the treble side highlighted in yellow.  To the right of that you see the "rolled out" side in 2D.  That will become a template a person can use to trace onto a piece of wood and get the profile cut out before bending the wood into an actual guitar side or "rib".
I've placed the side template on the blueprint and added 1/2" to each end so there's a little extra wood when the side is actually bent.  In the lower right I've placed a bitmap made from a simple tracing of a half template I made twenty years ago as a student!  I was able to draw a line accurately on the image to then make a symmetrical headstock outline.
By this point in the process I was feeling very comfortable drawing in 2D using Rhino.  Of course that comfort didn't last long as we've moved onto modeling a complete 3D dreadnought guitar.  So, now I'm back to that uncertain anxiety trying to figure it out.  Confidence builds with each successful step though.  More on that in a future post...

Over the last few weeks I nailed down some travel plans and it took more time than I expected.  This past weekend I actually ventured down to Des Moines Iowa to spend a couple days at The Lutherie Shop and Bilt Guitars.  You can find their websites at www.thelutherieshop.com and www.biltguitars.com.  A very special thanks to Tim, Scott and Bill for letting me invade their space for a couple days to see them in action.  These guys are true pro's and Tim is a graduate of the guitar program back in 1998.  I was able to watch them work, take lots of photos, ask a lot of questions and observe the work flow and project management. 

 Tim put me to work sanding out an electric body so they could get it in the spray booth.  I had to earn my keep!  Apparently that particular guitar is off to a guy named Wes in a band called Limp Bizkit. 

In the two days I was there Tim and Bill wrapped up three builds they've been working on.  There were two more guitars in the finishing process and yet another two guitars ready for sealer.  These guys don't mess around!

Two of the three guitars that were completed during my visit.  These guys are building some very cool retro inspired guitars.


Over the past month I've also been working on new packets of information for the Advanced Finishing class and have been working on editing new videos for the Electric Construction class.  These are pretty big projects but I know it'll be worth the effort.  I haven't forgotten about the electronics study and am actually getting ready to start working on several amps, pedals and pickups in the coming weeks.  Time to see if all this book study is paying off.  The guitar program has an amp we haven't used for several years because it stopped working within a couple of dusty school years.  So, I'm going to tear that thing apart and see what I can find.  The rest of the projects are my own amps and pedals so I'll save those for the weekends.  It turns out I have five wah pedals I didn't know I had.  Apparently it's "easier" to buy a new pedal than it is to order the parts and fix what I already have??? 

So that's it for now, back to working on some three dimensional dreadnought bracing!


Tuesday, September 24, 2013

Sabbatical Entry 2

The time is simply moving too quickly!  There have been many irons in the fire and lots of work getting done to be sure. 

On the curriculum front I've been working on a couple new packets of information for students.  The first is an all new take on the planning information for the Electric Construction course that runs in the spring semester.  This information has evolved over the years but this time I started from scratch and have put a lot of time into the new packet with some pictures and details that have never previously been included.  I'm really looking forward to putting this to use and ironing out the kinks with this years class.  The second packet of information I've been working on is for the Guitar Production and Development program.  The second year students are expected to be more self reliant than in the first year program and as part of that, they handle the finishing materials and equipment much more than they did last year.  So to address this reality and help everyone invovled I'm working on a packet of information for "finishing procedures" that goes beyond the mechanics of using a spray gun or a brush.  Instead, this packet is designed to give them the information they need to use the finishing area more efficiently by knowing where things are stored, which guns are for which materials, what solvents to use at certain times and how to handle, setup and clean the spray guns.  We use finishes that will ruin a spray gun if they're not cleaned properly or as was the case last year, not cleaned at all.  No more of that and no more excuses!

The CAD course is moving along at a perfect pace.  We're studying Rhino 5.0 which is not only a drafting program but a modeling program that gives the user an unbelievable amount of control in creating and designing just about anything the imagination can dream up.  We are in the process of working through a training manual but along the way we take the opportunity to put that to use on something directly related to guitars, mandolins or other fretted instruments.  We worked through creating an outline of a dreadnought acoustic guitar and from that created a three dimensional object.  Eventually we'll be doing a full 3D rendering of a dreadnought. For now though we've created the outline, extruded a 3D solid object in that shape and "rolled out" a side template.  There's a lot more to it but here's just a sample:
Above is a perspective view of some different things created in Rhino.  An outline of a dreadnought acoustic, a 3D extrusion, a radius dish and a side template.   The options for what can be done are virtually limitless and we've only scratched the surface thus far.
Another exercise related to instruments was to create a fingerboard.  Students can choose to create whatever scale length they want but in my case I simply went with a 25.5" scale.  I won't get into a step be step accounting but you can create a custom scale length using a simple formula and some arcs.  From there you can lay lines out, establish a taper and extrude it into three dimensions.  It's easy to organize the different parts you're doing and turn those on and off.

Here is a fingerboard as it appears when we're done.  On this particular fingerboard I chose a 9.5" radius.
These pictures are not in order but here I've turned on the arcs we created to find the location of each fret slot earlier in the process.  We don't necessarily have to keep but it's very easy to put them into another layer and turn them on and off as necessary.  I took the time to draw them, why not keep them just in case?
In this picture I've turned on another layer so the slot locations are visible.  It is from these blue lines that we make a taper and it begins to look like a fingerboard.  My high school geometry teacher could have inspired me by explaining this is how the frets in my guitar make the proper notes but I digress...
Here are some copies I made of the tapered fingerboard in two dimensions.  I could easily come back, extrude them and put a different radius on each one.

My Wednesday's are usually dedicated to electronics and there aren't any fancy pictures or illustrations to share here.  I have been focusing on a deeper understanding of electronics with emphasis on tube guitar amplifiers and their design.  The fact is, without the amplifier an electric guitar is incomplete!  Later I'll be working with pickup winding to create some pickups for the program we can use in class or in different school guitars and eventually be demonstrating how a pickup is made. 

I've set some dates for travel and am looking forward to spending a few days at the Colling's Guitar factory in Texas learning about how they organize their workflow, manage their manufacturing and seeing particular processes and procedures.  I can't thank them enough for being so generous with their time.  I'm not sure about taking photographs while I'm there but am hoping to share a few pictures on the blog if I can get the "ok".

The finishing time on Friday's has had some overlap with curriculum since I'm working on with the finishing procedures packet.  I did get a chance to meet with a sales rep about some new spray guns to phase out our turbine spray guns that have served us admirably for at least twenty years.  However, it's time to make sure all the equipment is what is on par with industry and this should make for a more efficient process and clearer understanding of equipment.  With these new spray guns all the different ones will share the same basic design.  In the coming weeks I'll be getting back to my test boards for the wood filling process. In October I'll make a trip to Des Moines and work with an alumni at his shop for a couple days.  We'll be working on all sorts of things but I'm excited to see his processes for doing touch up work on all sorts of different coatings.  Another big thanks goes out to him for giving up some time to have me there.  More on that later and I'll be sure to include the specifics in a blog post.

I think that's it for now, time to get back to work on some CAD (computer aided drafting) exercises and with any luck, finish that electric design packet of information.  Aim high right!?

Friday, September 6, 2013

Sabbatical Entry 1

This year summer seemed to come and go faster than any other I can remember.  Another school year is underway and the difference this year is I'm not teaching!  I'm very fortunate to have the opportunity to have a sabbatical for the fall semester and plan to update the "goings on" with our blog along the way.

Whenever I talk to someone about my sabbatical the first question (obviously) is..."What are you going to be doing?".  The reality is there are a variety of things I'll be working on and have planned a framework for each day of the week so here goes...

Monday - Curriculum day!
  • As instructors we are always making tweaks and changes to improve the content of our courses but inevitably there is only so much time in a day.  No matter how much of that time I spend updating handouts, presentations or course content there has been a growing "to-do list".  It actually feels more like a "wish-list"!  So Monday is the day to tackle all of the courses I teach and whittle it down while at the same time making some great updates and additions.

Tuesday - CAD/CNC!
  • One very exciting thing for me this fall is the opportunity to take a couple classes in our second year program.  From 8am - Noon I'm a student in the Guitar Development and Production program studying computer drafting for guitar that includes 3D modeling.
  • As the weeks go by we'll also be getting into CNC machines and their use in guitar making.  Computer Numerical Controlled machines allow for incredible precision work but it isn't quite "plug and play" stepping up to use one.  
  • The afternoon on Tuesday will usually be working with the software to spend time learning it and developing some drawings.  Also in the afternoon time can be spent on anything needing a little extra time for any particular week.

Wednesday - Electronics!
  • A fair amount of the information I teach has to do with electric guitars specifically and I've always wanted to talk more about pickups and how they're made.  The Electric Set-up course is plump full of information already but at the very least I want to demonstrate how to make an electric guitar pickup.  So, with time available I'll be working on pickup winding.  
  • There are also changes to course content I want to make and streamline some things to hopefully make room for a few additions to what students can learn.
  • The other portion of this time is being spent learning more about tube guitar amplifiers and how they are made.  I'm somewhat familiar with this already but it's time to sink my teeth into the topic and be able to relay some of these concepts and information to students in the program.  This can allow us to better understand "tone" and the never ending quest for the magical/mystical sound we (and our customers) have.  Oh...and by the way, I'll be making a tube guitar amp!

Thursday - CAD/CNC and Industry!
  • In the morning it's back to school for more in the CAD/CNC courses in the second year program.  The courses run again from 8am - Noon.
  • Thursday afternoons will be spent on industrial aspects of guitar making with some trips being planned for later in the fall.  More on this later but it's something I'm incredibly excited about.

 Friday - Finishing!
  • As the main instructor for all things guitar finishing related Friday's will be dedicated to the broad topic of wood finishing.  The first area I'm focusing on is a new pore filling process that will be more user friendly and more importantly, FASTER.  At the end of each school year we have a production setting with anywhere from 40-60 instruments being sanded, sprayed and every step in between within about a ten day window (controlled chaos).  The pore filling process is always time consuming and labor intensive and while I can't suddenly make it a quick easy process, I'm confident we can shave some dry time!
  • I'll also be updating some of the processes we use in both guitar programs. 
  • In October I will be taking a little road trip to a repair shop in Des Moines Iowa to focus on touch up techniques.  Again, more on this to come at a later date!

So there you have it.  My sabbatical has been about two years in the making and now it's time to seize this wonderful opportunity to hone my skills, learn new things and come back better than ever!

Monday, May 20, 2013

Well as is the case every year the 9 month program has flown by.  It is truly amazing how fast the year goes.  Unfortunately I was unable to incorporate blog contributions this spring in the Guitar Repair course to address a lack of volunteers to give the "student perspective" we hope for.

Rest assured although the blog has not been updated regularly everything else here in the program has been.  It's part of the reason we're so busy this blog gathers dust.  However I'd like to share a few links here for you to check out.

Remember....we are on Facebook and it's a little easier to "get the word out" about the "goings on".  Check out our page here!

This spring the college featured one of our students for the "student spotlight" and you should definitely check that out too!!

Here are a few student blogs worth checking out to get a sense for what it's like to be a student in our program.

Aaron

Chris

Tim

Now when fall semester rolls around I will be posting here regularly about my sabbatical.  So while I'm very excited about that amazing opportunity for now I'll enjoy the long awaited warm weather and forget about the 14" of snow we woke up on May 2nd, 2013.  Seriously...the campus was shut down for a SNOW DAY in May!!!!