Friday, March 27, 2015

Electric Guitar Construction week 2

As I progress in my build I find myself dreading the weekend. I have completed my second week of electric guitar construction which meets two days a week. Sometimes it’s absolutely nerve racking knowing that I could slip up and make a mistake at any given moment. However, the feeling of making something absolutely perfect in shape and size in the work piece is next to none in the luthierie world focus is absolutely key in producing a well built and aesthetically pleasing guitar.

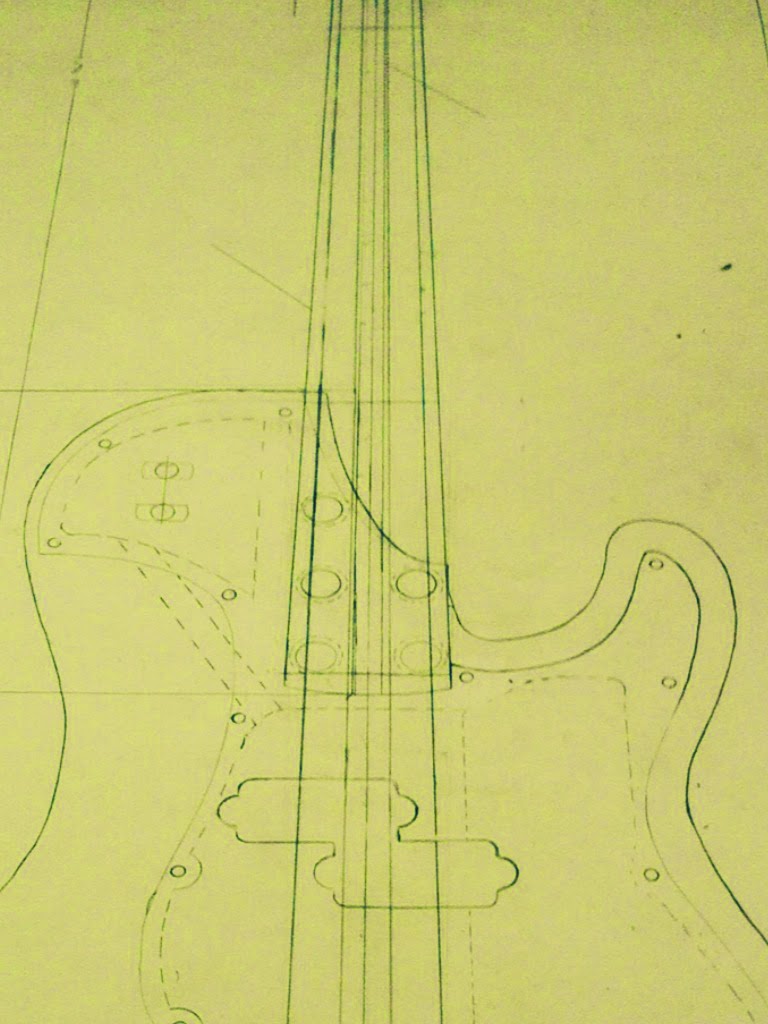
This week we began with a demonstration on using routers. For electric guitar construction routers are the most frequently used tool. Last week I used the router table to flush trim the body by running the bearing of the bit over my template. This week I started to route a channel out to connect my two control cavities. To do this I drilled a hole with a Forstner bit on either side of the channel and then set up a straight edge to run the base of the router along.


I did this before gluing on my cap because the channel would run out past where I wanted my pick guard to be. Once the channel was routed and cleaned up with a bit of sandpaper I lined up the flamed cherry drop cap buy drilling holes and filling them with dowels to prevent the wood from shifting when being glued. To glue the cap on I used a veneer press with 2 pieces of flat plywood on either side to distribute clamping pressure evenly. After doing a dry run I taped off the cavity and spread some glue around evenly and pressed the boards together waiting 90 minutes before unclamping.


In the mean time I began construction of the neck and fingerboard. I ran into a hiccup with my fingerboard. I set up the fretslot table and cut my 21 frets using a 35 inch template.


On Fender style fingerboard the nut shelf is built into the fingerboard; therefore when making a Fender style fingerboard you do not want to cut off the fingerboard at the nut….. I did, so I had to do some creative thinking and use some excess fingerboard to give the illusion of this shelf that wasn’t cut off. First I cut the excess so that the grain lines matched up as much as possible then I squared up the board with a hand plane and disc sander. After that I removed the safety guard from the table saw to create a miter on the edge of the board. I'll glue this little chunk onto the board after I glue on my fingerboard.


The next step was for me to route out a channel for my truss rod. The first thing I did was take my flame maple board and square it up and then plane it down to the proper thickness (that being just over ¾ of an inch). Afterwards I routed out a channel for my truss rod.


 After cleaning up the channel with some sand paper I routed out two additional channels for some carbon fiber reinforcement beams.


I then created some plugs for the end of the boards. This ensures that there isn’t any movement of the carbon fiber boards and keeps gunk out of the truss rod channel as well as creating a more professional appearance. I then unclamped the body to make sure everything was glued properly and everything looks good!

Tune in next week for the next addition to the build: more on the neck construction process

-John Potts

Wednesday, March 18, 2015

Electric Guitar Construction Week 1

      I've been dreaming of making an electric guitar for quite some time now, sitting in high school imagining what kind of body shape I would make, what kind of inlays I would use, or what odd assortment of electronics I would put in it. For a while now that thought has been just that: a dream. But just last week I began construction on my first self-designed electric guitar.

      Last fall we designed our guitar in an electric guitar design class. I decided that I wanted to build a bass (that being my instrument of choice). The bass I designed was a sort of adaptation of a fender P-bass. The main change was that I wanted to have a single cut away to create more space for electronics. Because of this decision I had to replace the traditional neck plate with 5 ferules. Other than the neck body joint and the single cut away the body and neck shape will remain similar to a traditional fender p bass.


       Step number one for electric guitar construction was to make templates from the plans we had drawn up. Because I decided to use a more complicated design I had to make a few extra templates. The first template I made was for the body shape. The second template I made was for routing the control cavity. The last template I made was for my custom pick guard. All of these templates would be used to flush trim and/or plunge route the various parts of the guitar.


       After rough cutting the templates I had to spend quite a bit of time sanding edges to get rid of any ridges or dips that would prevent the router from making a clean cut.


       After that I joined the mahogany and used three bar clamps to clamp up the two halves of the body and cleaned up all glue squeeze out.


      The next step is to rough cut the body and drop cap. I chose to build the body with ribbon African mahogany and the drop cap to be flamed cherry.


       After that I screwed my template to the mahogany and routed the final shape of my guitar body.


Hope you enjoyed the blog, tune in next week for another addition to this exciting build!

-John Potts

Tuesday, March 3, 2015

Acoustic Construction Lab - Week 6 & 7


 With only two weeks of class left, it is time to finish up this build. I used a routing jig and a plunge router to slot my headstock. After routing, I used files and sandpaper to carve string ramps in the slots to allow the strings to travel from the nut to the tuning machines. The slotted headstock is a traditional look that I wanted to include as part of my build, and I did this process by studying measurements from an old Martin blueprint.


 With the headstock shaped and slotted, it was time to glue the neck onto the body. I used hot hide glue on the neck and body joint due to its reversibility ease, required for performing neck resets. I used three clamps to apply pressure and allowed it to set overnight. 


 After attaching the neck, I fretted the fingerboard and glued it into position. I drilled small holes through the 1st and 13th fret slots into the neck stock. I stuck pins into the holes to keep the fingerboard in the correct position and prevent it from slipping while applying clamps to spread pressure. I used hot hide glue for this process, and allowed it to set for close to four hours. 


 The final week of Acoustic Construction Lab was spent meticulously shaping the neck and sanding the guitar. I used a rasp and sanding sticks to carve a soft V shape into the back of my mahogany neck, It was a slow and steady process. Once I was happy with the feel of the neck, I started the finish sanding process. I started by sanding the whole guitar out with 150 grit sandpaper, checking closely for scratches with a lamp. The process was repeated working through sandpaper grits until the guitar was completely sanded out to 240. By the last day of class my guitar was close to ready for finish lacquer, but will be placed in its new case where it will stay for the next seven weeks while I move on to my Electric Construction Lab and Finishing classes. 


 After apply the finish to the guitar, the bridge will be glue in position and drilled for strings. The tuning machines will be installed, nut and saddle constructed and the pickguard attached. I couldn't help but place the pickguard and bridge in position to get a feel for what the finished instrument will look like, as for now this build is completed.


- Justin Ness