Now lets get to backs & sides... first we thicknessed the backs.


Next I shaped the ribs. First I found the book match that I wanted on the bottom of the guitar.

I double stick taped them together. Jointed one end, traced the outline and band saw/sanded them to the shape of my template.

I marked the outside of the guitar and marked which side would connect to the top and which to the back of the guitar.

Now it was time to bend the sides. We did this with heat and a mold. First we wraped the sides with a wet paper towel, then wrapped it in aluminum foil.

Then I measured and marked the spot where the center of the waist was going to be.

I matched this with the waist line.

I then sandwiched my rib with a heat blanket and 2 pieces of spring steel.

I heated it up for 45 seconds. Then I clamped the waist in.


smoothed down the sides very carefully and clamped them with jorgenson clamps.


I let it cook for 1.5-2 minutes more. Then let it sit for 15 min. Re-adjusted the rib and re-clamped it. Cooked it for another 2 minutes and let it sit for 10 minutes. and then,,,,,,,,,, whah-lah!

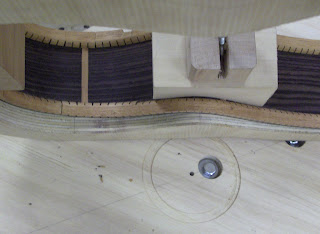
Then I put into the mold that I made and clamped it up.

Earlier I used a turnbuckle and some maple blocks to hold the center cauls in place.

Cutting into the maple, drilling holes and filling them with glue and dowels.

I did the same thing to my other rib and then it sits in there like that.

So after I shaped my sides I had some extra side wood left over. So I marked the centerline and sawed off the excess so that the 2 sides fit perfectly in the mold.

Then I made a tail block and a neck block for the guitar. Mine are made out of mahogany and they are cut 1/8" tall to over compensate. The thick block is for the neck. Later I will route a dovetail fitting into it so that I can set the neck.

Before gluing them in I need to make them sit flush against the sides. So I took out the sides and placed some adhesive sand paper on the area where the block will sit. Then I sanded the back side of the block to fit.


When the blocks fit well. I shimmed up the mold 1/16" to spread the 1/8" extra on the top and back of the guitar. Then I used a number of clamps and titebond 2 glue. I use Titebond 2 because it is water proof and if I ever need to reset the neck I can steam it off without ungluing the neck block.


After that is dry I sanded the sides and prepared them for gluing side braces.

Side braces are thin pieces of wood that run from the top to back of the guitar evenly. I used a tape measure to spread them out easily placing 4 on each side.

I used titebond glue. I clamped each brace with 1 spring clamp to clamp to the rib, and 1 cam clamp to clamp to the mold. I also used a thicker piece of wood for a caul.

Afterwards I cleaned up the glue squeeze out and sanded it smooth.

Next I prepped my back for braces. I cut out the back and drew in the brace pattern with a template.

Then I used more strips from my top make a back graft with the grain running perpendicular to the grain of the back.

I used the Go Bar deck with a 20' radius to glue the graft in. First I used a straight edge to line the graft up and removed it once the go bar sticks were in. I also used a go bar stick as a caul.


Next placed the aforementioned template on the back and clamped it down.


Then I used the flat edge of my chisel to cut down into the graft.

Next I used a skinnier chisel to remove the slots for the braces.

I radiused some brace material and used a jig to taper the ends. We used a jig because we have another jig from slotting into the sides later.


Here I've made up some more radiused cauls.

Next I placed the back on the deck with the template clamped over it.

Then I glue the braces in with the template on so the are perfect. I used Titebond.

Then after 15 minutes or so I came back, removed the template, cleaned up the glue squeeze out and reclamped for an hour.

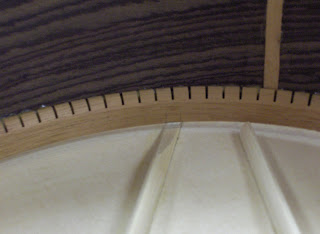
Next I began to glue in the kerfing. The kerfing is used to glue the top and back to the sides.... because I have the side braces in... I have to notch out the kerfing so the braces fit and the kerfing sits flush. I do this by using a thin strip of adhesive sandpaper on a piece of plexiglass. This helps me to notch it the perfect depth.


I clamp up the kerfing with about 100 clothes pins and rubberbands.

I used Titebond glue and leave the kerfing 1/32" - 1/16" over the rib.

And there it is!

Next I put a radius into the edge of the sides and kerfing. I marked the edge with a china marker.

For the top, I put sandpaper on a radius bar, balancing one end on a block and sanding down the other edge til the mark dissapears. I use a 20' radius for all the top except the neck block near the upper transverse brace where I use a 25'.

Then I turn the radius bar and sand the center.

For the back which has the same radius of 20' I use an abrasive radius dish. I place the sides in and turn it back and forth until the marks disappear.

Now its all ready for the top to be fitted and glued in!


