Then we used a jointer plane and a shooting board to trim each piece perfectly straight.

We used a light board to check to make sure there were no gaps.

This jig is used to glue the top together using pressure from the sides. We use hide glue for the majority of the building process.


and the result... 2 becomes 1.

Then I went to my top in which was joined together last night and I am happy to say has a great looking, nearly invisbale glue-joint.

I then thickness the top (again) to a frightening 3.5mm. You can really feel the stiffness along the grain now and you can feel an amazing flexibility across the grain.... spruce is cool.

I cut my top to a rough shape and kept the left over pieces which I will use for different braces and grafts later.

Next we started to install our rosettes. First I clamped my top to my workboard and I drilled a hole in the center of where my sound hole would end up.

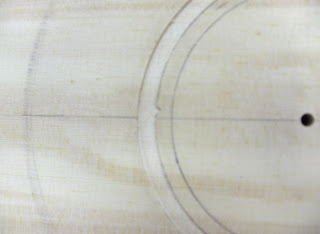
So I used a compass and drew out my soundhole, 3 7/8 diameter, and my rosette, 1/4 inch outside of the soundhole. I stuck a short pin through the hole and into the work board.

I then set up a router using a circular jig that sat on the pin. I set it for about half the thickness of the top wood (1.5mm).

And the jig gave me a perfect circle.

I set my rosette in and glued it with titebond.

It glued in pretty nice.

I scraped and sanded the rosette flush with the top. Now its time to cut out the sound hole. I set up the router again. This time setting it deep enough to go through the top wood and into the workboard. I set the jig up and locked it into place for my 3 7/8 sound hole diameter.
So I went ahead and routed it and now you cant even tell.

So I flipped the top over and sanded the inside to 150 grit from the 80 grit scratches from the thickness sander... drew my center line and marked the lines for my braces.


I then started to put together braces. I cut down brace stock to the approximate size using very straight grained Engleman spruce stock. I used quarter sawn pieces so that the braces won't want to twist or distort. We then sent them through the thickness sander so that they would be the perfect width. We had to radius the braces with this jig. I am building a Gibson style so I am using a 20 foot radius.


After I put a radius in the braces I want to glue them in. I have to glue them in different groups and shape them in between gluing... so first I started with my X brace... The most important of the top braces.
First I used a carpenters protractor to get the exact angle of my x brace... which for the Gibson bracing style is 103 degrees.

Then I marked it on my braces... I marked it on the top of one and the bottom of the other so they will fit together..

Then I used my Japanese saw to cut the grooves in them.


It took a while to fit the braces so that they were snug and at the perfect angle... but eventually I got it.

Now its time to glue them in. To get the most amount of downward pressure we use a go-bar deck.

It has a radius dish in the bottom.

And you use these long sticks to create firm downward pressure.


It also helps to glue a lot of things a once.

So I used hot hide glue again and glue each brace in one at a time... then wait for 2 hours.

Unfortunately after I glued I noticed that I had a cracked brace...

I tried gluing it back together with more hide glue and a smaller clamp..

But it broke apart again during shaping.

I decided that this brace is just too important... since it was the bottom brace I had to get rid of both of them, so I planed them all the way off and started over. re-sand, make new braces, thickness, knotch together and glue.


Once the new x braces were in.... I planed them to height, shaped them and scalloped the ends using my block plane, finger planes, chisels, and sand paper. I will do more to this later when I "voice the top".

Next I preped my lower transverse braces and my finger braces. These taper to 1/8" and sit right against the X braces.


Since I scallop these before gluing I have to use clamping cauls so that I have a level surface and I dont dent the soft spruce.


Next I glued in my upper transverse brace.... since this brace is near where the neck meets the body... I cant have too much radius, so I glue this brace in at a 25' radius instead of 20'.

Next I am going to make my bridge plate. The strings of the guitar go through the bridge and through the top of the guitar... They are pulling at the top with around 180 lbs of pressure.... so I use a hardwood to reinforce the bridge... in this case Indian Rosewood.
First I use paper to make an outline for how big and what shape the plate will be so it can fit in between the X braces and lower transverse brace.

Then I trace it on the plate.

Cut it out and fit it.

Then I use some of my leftover topwood to make 3 soundhole braces and the upper transverse graft.

I also use it to make a cap for the x brace with the notched top.

Then I glued them all in using cauls made of wood and plexi.


Then I shaped the cap to reinforce the X braces.

