
For the Electric Guitar Construction Lab, I created a blueprint based off a classic Fender Precision bass guitar. I altered the neck dimensions and headstock shape to my liking and made the full scale blueprint with pencil and paper as part of the Electric Guitar Design class earlier this year.

I decided to use Alder for the guitar body, and hard maple for the neck. I started the building process by jointing two pieces of 2" think Alder together to give me a blank wide enough to cut my solid body from. I did this by using the power jointer and planer to square the boards, then glued and clamped them together.

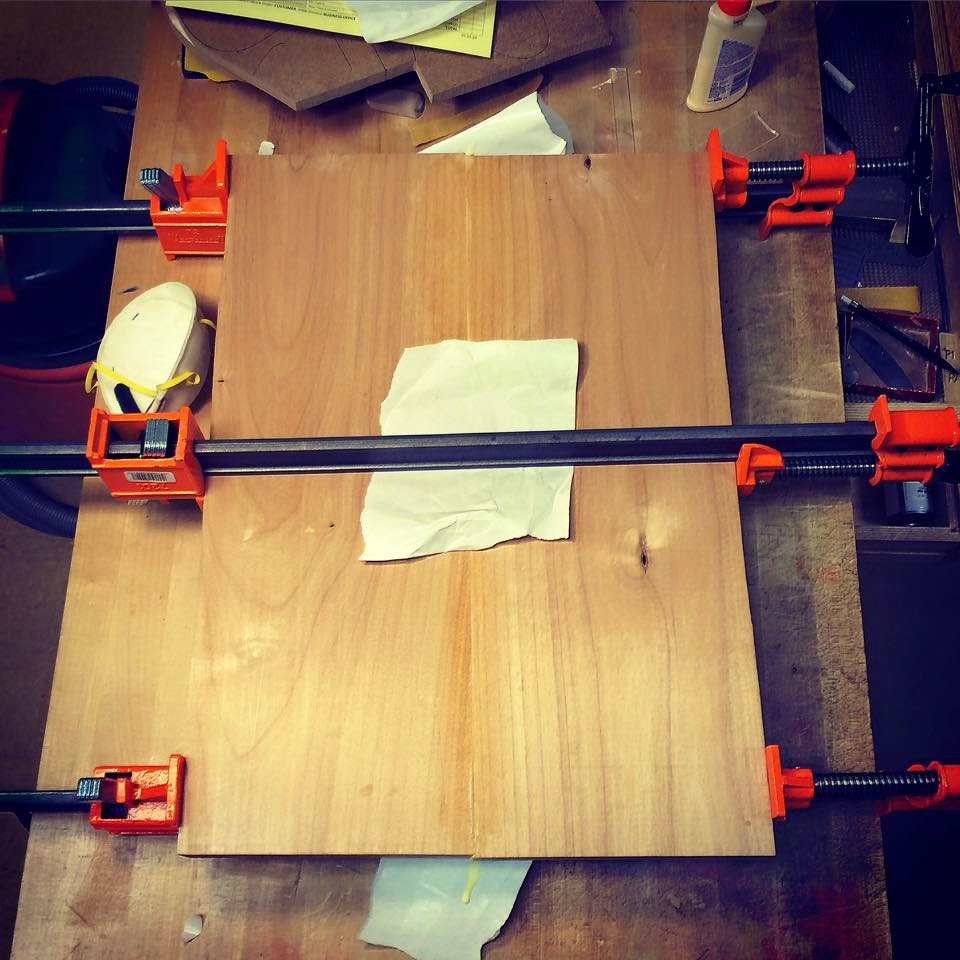
I made routing templates out of plywood for my body, headstock and control cavity. They were made to exact size by referencing my blueprint, and the edges sanded smooth for routing. Once the body joint was dry, I thickness sanded the body to 1 3/4" and traced the body template onto the blank. I used a bandsaw to cut it out slightly oversize, stuck my template to the top and flush trimmed using a router table.


For the neck, I decided to use a piece of slab cut maple that was thick enough to re-saw a fingerboard, giving the appearance of a once piece maple neck. I squared the board, and used the bandsaw to re-saw a 1/4" thick cut off the face to be used as a fingerboard. I made sure to mark the edges of the stock so I could properly alight the fingerboard and neck grains when gluing the pieces back together, making the seam hard to notice. I routed a truss rod slot into the neck stock, as well as two slots for carbon fiber rods to offer further stability to the neck.

I cut the fret slots into the fingerboard, laid out the neck taper and planed it to dimension. I then glued the fingerboard to the neck stock and clamped it to dry for a few hours. Once dry, I used my template to cut out my headstock, and used a router to flush trim it to the finished shape.


I setup a fence on the spindle sander and used it to thickness the headstock to size, blending the transition to the fingerboard. Using the bandsaw, I removed the excess neck material, and routed it flush with the fingerboard on the router table. I laid out the fingerboard for my position markers and used a drill press to drill the 5mm holes for the round dots. I glued them in place, sanded the fingerboard radius and installed the frets.

The body and neck construction is nearing completion, the next step will be routing the neck pocket and attaching the neck to the body. It's looking like the bass I imagined, and it should all come together soon.

- Justin Ness